
다듬어 정리하지 않고, 공부하면서 작성한 내용입니다. 양해 바랍니다.
저번에는 Zuul을 사용하여 강의를 계속 진행하는 줄 알았는데, 그게 아니라 cloud Gateway 이전에, 대략적인 작동원리에 대해 설명해주시기 위해서 Zuul을 사용했던 것이었다..ㅠ
RequestContext
웹 프로젝트에서 request, response에 대한 정보를 가진 최상위 객체이다.
이를 통해 request나 response가 없는 메소드에서도, 정보를 받아와 사용할 수 있다.
사용 방법은 다음과 같다.
RequestContext ctx = RequestContext.getCurrentContext();
HttpServletRequest request = ctx.getRequest();
Spring Cloud Gateway
Spring Cloud Gateway를 사용하면 Zuul과는 다르게 비동기 처리가 가능하다.
따라서 Spring Cloud Gateway를 사용하면 Tomcat 대신 비동기 기능을 지원하는 Netty 서버를 사용하게 된다.
프로젝트 생성

application.yml
server:
  port: 8000

eureka:
  client:
    register-with-eureka: false
    fetch-registry: false
    service-url:
      defaultZone: http://localhost:8761/eureka


spring:
  application:
    name: gateway-service

  cloud:
    gateway:
      routes:
        - id: first-service
          uri: http://localhost:8081/
          predicates:
            - Path=/first-service/**

        - id: second-service
          uri: http://localhost:8082/
          predicates:
            - Path=/second-service/**
first-service ,second-service 생성
(둘 다 Dependencies 동일)
first-service
@RestController
public class FirstServiceApplication {


    @GetMapping("/welcome")
    public String welcome(){
        return "Welcome to the First Service";
    }
}
application.yml
server:
  port: 8081

spring:
  application:
    name: my-first-service


eureka:
  client:
    register-with-eureka: false
    fetch-registry: false
second-service - 컨트롤러 생성
@RestController
public class SecondService {


    @GetMapping("/welcome")
    public String welcome(){
        return "Welcome to the Second Service";
    }
}
application.yml
server:
  port: 8082

spring:
  application:
    name: my-second-service


eureka:
  client:
    register-with-eureka: false
    fetch-registry: false
문제점
위의 설정대로 설정한 후, 127.0.0.1:8000/first-service/welcome 으로 요청을 보내보자.
NotFound에러가 발생할 것이다.
그 이유는 http://localhost:8081/ 뒤에 predicates에서 설정한 Path인 /first-service/** 다음과 같이 결합된다.
http://localhost:8081/first-service/**
따라서 NotFound 에러가 발생하는 것이고, 이를 해결하기 위해 컨트롤러를 다음과 같이 수정하자.
(이후에는 컨트롤러를 수정하지 않고, 주소를 변경시키는 작업을 하겠지만, 지금은 우선 편의를 위해 컨트롤러를 수정하는 것이다.)
@RestController
@RequestMapping("/first-service")
public class FirstServiceApplication {


    @GetMapping("/welcome")
    public String welcome(){
        return "Welcome to the First Service";
    }
}
@RestController
@RequestMapping("/second-service")
public class SecondService {


    @GetMapping("/welcome")
    public String welcome(){
        return "Welcome to the Second Service";
    }
}
Spring Cloud Gateway - Filter 적용
클라이언트는 Spring Cloud Gateway에다가 요청정보를 보내면 Gateway는 어느 서비스로 요청할 지 판단한 후 요청을 보내준다.
Gateway의 작업을 좀 더 자세히 살펴보자면 먼저 Gateway에 어떤 요청이 들어왔는지 요청 정보를 받는 Gateway Handler Mapping, 해당 요청에 대한 사전 조건, 즉 어떠한 이름으로 요청됐는지 조건을 분기해주는 Predicate, 사전 필터(Pre Filter)와 사후 필터(Post Filter)를 사용하여 추가 작업을 진행한다. 필터의 작업은 자바 코드를 사용하여 구성하거나 Property를 사용하여 구성할 수 있는데, Property를 사용하는 방법은 우리가 지금까지 진행했던 application.yml 파일을 사용하여 구성한 것이다.
이제는 자바 코드를 이용하여 구성해보겠다.
우선 Gateway Server의 yml파일을 다음과 같이 수정하자.
server:
  port: 8000

eureka:
  client:
    register-with-eureka: false
    fetch-registry: false
    service-url:
      defaultZone: http://localhost:8761/eureka


spring:
  application:
    name: gateway-service

#  cloud:
#    gateway:
#      routes:
#        - id: first-service
#          uri: http://localhost:8081/
#          predicates:
#            - Path=/first-service/**
#
#        - id: second-service
#          uri: http://localhost:8082/
#          predicates:
#            - Path=/second-service/**
Java Code를 사용한 필터 - FilterConfig.java
@Configuration
public class FilterConfig {

    @Bean
    public RouteLocator gatewayRoutes(RouteLocatorBuilder builder){

        return builder.routes()
                .route(r -> r.path("/first-service/**")//경로로 들어오면
                        .filters(f -> f.addRequestHeader("first-request","first-request-header")//requestHeader에 추가
                                .addResponseHeader("first-response","first-response-header"))//responseHeader에 추가
                        .uri("http://localhost:8081"))//해당 uri로 이동하겠습니다

                .route(r -> r.path("/second-service/**")//경로로 들어오면
                        .filters(f -> f.addRequestHeader("second-request","second-request-header")
                                .addResponseHeader("second-response","second-response-header"))
                        .uri("http://localhost:8082"))


                .build();
    }
}
firtst-Service, second-Service에 추가
@RestController
@RequestMapping("/first-service")
@Slf4j
public class FirstServiceApplication {


    @GetMapping("/welcome")
    public String welcome(){
        return "Welcome to the First Service";
    }

    @GetMapping("/message")
    public String message(@RequestHeader("first-request")String header){

        log.info(header);
        return "Hello World in First Service";
    }
}
다음으로 요청을 보내보자
- 127.0.0.1:8000/first-service/welcome
- 127.0.0.1:8000/first-service/message
- 127.0.0.1:8000/second-service/welcome
- 127.0.0.1:8000/second-service/message
이제 Property 파일을 가지고도 필터를 적용해보자.
Property 를 사용한 필터 - FilterConfig.java
기존에 작성했던 FilterConfig파일은 주석처리를 해두자.
application.yml
server:
  port: 8000

eureka:
  client:
    register-with-eureka: false
    fetch-registry: false
    service-url:
      defaultZone: http://localhost:8761/eureka


spring:
  application:
    name: gateway-service

  cloud:
    gateway:
      routes:
        - id: first-service
          uri: http://localhost:8081/
          predicates:
            - Path=/first-service/**
          filters:
            - AddRequestHeader=first-request, first-requests-header2
            - AddResponseHeader=first-response, first-response-header2

        - id: second-service
          uri: http://localhost:8082/
          predicates:
            - Path=/second-service/**
          filters:
            - AddRequestHeader=second-request, second-requests-header2
            - AddResponseHeader=second-response, second-response-header2
똑같이 다음으로 요청을 보내보자
- 127.0.0.1:8000/first-service/welcome
- 127.0.0.1:8000/first-service/message
- 127.0.0.1:8000/second-service/welcome
- 127.0.0.1:8000/second-service/message
Spring Cloud Gateway - 커스텀 필터 적용
로그를 출력하거나, 인증(Authentication)을 수행하는 등의 기능을 하는 커스텀 필터를 만들어서 적용해보자.
커스텀 필터를 적용하기 위해서는 AbstractGatewayFilterFactory<커스텀필터클래스.Config>를 상속받아 등록해야 한다.
기능은 apply라는 메소드를 작성해주면 된다.
그리고 위에서도 설명했다시피 비동기 방식으로 Http를 사용할 때에는 HttpServletRequest 대신 ServerHttpRequest와 ServerHttpResponse를 사용한다.
우선 단순 로그를 출력하는 필터를 추가해보자
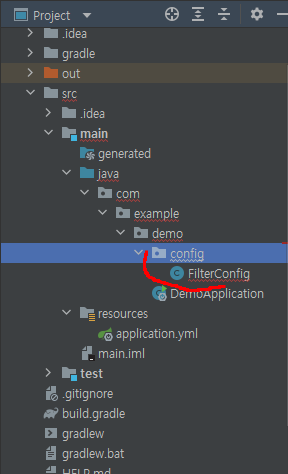
CustomFilter 추가
package com.example.demo.filter;

import lombok.extern.slf4j.Slf4j;
import org.springframework.cloud.gateway.filter.GatewayFilter;
import org.springframework.cloud.gateway.filter.factory.AbstractGatewayFilterFactory;
import org.springframework.http.server.reactive.ServerHttpRequest;
import org.springframework.http.server.reactive.ServerHttpResponse;
import org.springframework.stereotype.Component;
import reactor.core.publisher.Mono;

@Component
@Slf4j
public class CustomFilter extends AbstractGatewayFilterFactory<CustomFilter.Config> {

    public CustomFilter() {
        super(Config.class);
    }


    @Override
    public GatewayFilter apply(Config config) {
        //Custom Pre Filter

        return (exchange, chain) -> {
            ServerHttpRequest request = exchange.getRequest();
            ServerHttpResponse response = exchange.getResponse();

            log.info("Custom PRE filter: request id -> {}", request.getId());

            //Custom Post Filter
            return chain.filter(exchange).then(Mono.fromRunnable(() -> {
                log.info("Custom Post filter: response code -> {}", response.getStatusCode());
            }));

        };
    }

    public static class Config {
        //Put the configuration properties
    }


}
application.yml
server:
  port: 8000

eureka:
  client:
    register-with-eureka: false
    fetch-registry: false
    service-url:
      defaultZone: http://localhost:8761/eureka


spring:
  application:
    name: gateway-service

  cloud:
    gateway:
      routes:
        - id: first-service
          uri: http://localhost:8081/
          predicates:
            - Path=/first-service/**
          filters:
#            - AddRequestHeader=first-request, first-requests-header2
#            - AddResponseHeader=first-response, first-response-header2
             - CustomFilter

        - id: second-service
          uri: http://localhost:8082/
          predicates:
            - Path=/second-service/**
          filters:
#            - AddRequestHeader=second-request, second-requests-header2
#            - AddResponseHeader=second-response, second-response-header2
- CustomFilter만든 CustomFilter를 개별 routes마다 등록해 주어야 한다.
firstService , secondService 추가
package com.example.demo;

import lombok.extern.slf4j.Slf4j;
import org.springframework.web.bind.annotation.GetMapping;
import org.springframework.web.bind.annotation.RequestHeader;
import org.springframework.web.bind.annotation.RequestMapping;
import org.springframework.web.bind.annotation.RestController;

@RestController
@RequestMapping("/first-service")
@Slf4j
public class FirstServiceApplication {


    @GetMapping("/welcome")
    public String welcome(){
        return "Welcome to the First Service";
    }

    @GetMapping("/message")
    public String message(@RequestHeader("first-request")String header){

        log.info(header);
        return "Hello World in First Service";
    }

    @GetMapping("/check")
    public String check(){
        return "Hi, there. This is a message from First Service";
    }


}
package com.example.demo;

import lombok.extern.slf4j.Slf4j;
import org.springframework.web.bind.annotation.GetMapping;
import org.springframework.web.bind.annotation.RequestHeader;
import org.springframework.web.bind.annotation.RequestMapping;
import org.springframework.web.bind.annotation.RestController;

@Slf4j
@RestController
@RequestMapping("/second-service")
public class SecondService {


    @GetMapping("/welcome")
    public String welcome(){
        return "Welcome to the Second Service";
    }

    @GetMapping("/message")
    public String message(@RequestHeader("second-request")String header){

        log.info(header);
        return "Hello World in Second Service";
    }


    @GetMapping("/check")
    public String check(){

        return "Hi, there. This is a message from Second Service";
    }
}
요청을 보내보면 다음과 같이 잘 작동한다.

Spring Cloud Gateway - Global 필터 적용
Global Filter도 이전에 만들었던 Custom Filter와 마찬가지로 AbstractGatewayFilterFactory를 상속받아 구현한다.
Custom필터는 필터 적용을 위해서는 원하는 라우터 정보에다가 개별적으로 등록해야 하지만, Global필터는 한번만 지정하면 모든 라우터 정보에 적용된다.
그리고 글로벌 필터는 가장 먼저 실행되고 가장 나중에 종료된다.
한번 적용해보자.
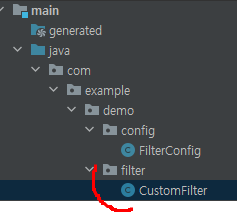
GlobalFilter 추가
(위치는 CustomFilter 위치와 동일하다)
package com.example.demo.filter;

import lombok.Data;
import lombok.extern.slf4j.Slf4j;
import org.springframework.cloud.gateway.filter.GatewayFilter;
import org.springframework.cloud.gateway.filter.factory.AbstractGatewayFilterFactory;
import org.springframework.http.server.reactive.ServerHttpRequest;
import org.springframework.http.server.reactive.ServerHttpResponse;
import org.springframework.stereotype.Component;
import reactor.core.publisher.Mono;

@Component
@Slf4j
public class GlobalFilter extends AbstractGatewayFilterFactory<GlobalFilter.Config> {

    public GlobalFilter() {
        super(Config.class);
    }


    @Override
    public GatewayFilter apply(Config config) {
        //Custom Pre Filter

        return (exchange, chain) -> {
            ServerHttpRequest request = exchange.getRequest();
            ServerHttpResponse response = exchange.getResponse();

            log.info("Global filter baseMessage:  {}", config.getBaseMessage());

            if(config.isPreLogger()) log.info("Global filter Start : request id -> {}",request.getId());

            //Custom Post Filter
            return chain.filter(exchange).then(Mono.fromRunnable(() -> {
                if(config.isPostLogger()) log.info("Global filter End : request id -> {}",response.getStatusCode());
            }));

        };
    }


    @Data
    //application.yml 파일에서 설정해 줄 것임
    public static class Config {
        private String baseMessage;
        private boolean preLogger;
        private boolean postLogger;

    }


}
application.yml
(default-filters 추가)
server:
  port: 8000

eureka:
  client:
    register-with-eureka: false
    fetch-registry: false
    service-url:
      defaultZone: http://localhost:8761/eureka


spring:
  application:
    name: gateway-service

  cloud:
    gateway:
      default-filters:
        - name: GlobalFilter
          args:
            baseMessage: Spring Cloud Gateway Global Filter
            preLogger: true
            postLogger: true

      routes:
        - id: first-service
          uri: http://localhost:8081/
          predicates:
            - Path=/first-service/**
          filters:
#            - AddRequestHeader=first-request, first-requests-header2
#            - AddResponseHeader=first-response, first-response-header2
             - CustomFilter

        - id: second-service
          uri: http://localhost:8082/
          predicates:
            - Path=/second-service/**
          filters:
#            - AddRequestHeader=second-request, second-requests-header2
#            - AddResponseHeader=second-response, second-response-header2
             - CustomFilter
잘 출력된다!

📔 Reference
Spring Cloud로 개발하는 마이크로서비스 애플리케이션(MSA) - 인프런 | 강의
Spring framework의 Spring Cloud 제품군을 이용하여 마이크로서비스 애플리케이션을 개발해 보는 과정입니다. Cloud Native Application으로써의 Spring Cloud를 어떻게 사용하는지, 구성을 어떻게 하는지에 대해
www.inflearn.com
'모각코 > 2021 동계 모각코 : 안꿀단지' 카테고리의 다른 글
| [목표] 모각코 4회차 목표 (0) | 2022.01.17 |
|---|---|
| [회고] 3회차 회고 (0) | 2022.01.10 |
| [목표] 모각코 3회차 목표 (0) | 2022.01.10 |
| [회고] 2회차 회고 (0) | 2022.01.03 |
| [목표] 모각코 2회차 목표 (0) | 2022.01.03 |